Excelite

The Ultimate Guide to Installing Polycarbonate Roofing Panels

This comprehensive guide will walk you through the step-by-step process, ensuring a successful installation every time.

Polycarbonate roofing panels are an excellent choice for various home improvement projects, offering durability, UV protection, and lightweight construction. Whether you’re building a greenhouse, a patio cover, or a pergola roof, these panels provide a versatile and energy-efficient solution for your roofing needs. 

In this comprehensive guide, we’ll walk you through the polycarbonate roof installation process, from preparation to finishing touches.

Installing polycarbonate roof panels may seem challenging, but with the right tools, materials, and step-by-step instructions, it can be a rewarding DIY project for beginners and seasoned diy enthusiasts alike. 

This guide will cover everything you need to know, including necessary tools, installation techniques, and tips for a successful installation, ensuring a better experience and a durable new roof.

Roof for Installation

What Are Polycarbonate Roofing Panels and Their Benefits?

Overview of Polycarbonate Roofing Panels

Polycarbonate roofing panels are a lightweight, durable, and impact-resistant roofing material that has become increasingly popular for a wide range of applications. Known for their versatility, these panels are available in clear, tinted, and corrugated options, catering to various architectural and functional needs. Their ability to provide UV protection and weather resistance makes them an excellent choice for areas exposed to direct sunlight and extreme weather conditions.

These panels are commonly used in both residential and commercial building projects due to their combination of affordability and strength. Whether for a shed roof, porch roof, or sunroom, polycarbonate panels allow for high light transmission while offering protection against harmful UV rays. This balance of natural light and protection makes them a preferred roofing material for a variety of installations. 

Advantages of Polycarbonate Roof Panels

Polycarbonate roof panels are highly versatile and are particularly suited for greenhouses, pergola roofs, and patio covers.

For instance, in greenhouses, their transparency facilitates optimal light transmission, fostering plant growth while shielding the interior from harmful UV rays. Pergolas and patio covers benefit from their lightweight structure, which doesn’t add unnecessary weight to the roof support.

Energy efficiency is another key advantage. Multiwall polycarbonate sheets provide excellent thermal insulation, which helps regulate temperature changes and reduce heat buildup in enclosed spaces. This feature makes them ideal for sunrooms or even living rooms that require a balance between natural light and temperature control.

Moreover, polycarbonate roofing sheets come in various sizes, such as the popular 4×8 sheets, which make them adaptable to projects of different scales. Their affordability also sets them apart from more expensive options like tempered glass, making them a cost-effective solution for both small and large roofing projects.

  • Durability and Strength
  • Lightweight
  • Transparency
  • Versatility
  • Energy Efficiency
flat Roof for Installation

Tools and Materials Needed for Polycarbonate Roofing Installation

For a proper installation of polycarbonate roofing panels, having the right tools and materials is essential. Start with a measuring tape to ensure accurate measurements and a circular saw for precise cutting of the panels. A drill bit will be necessary for creating screw holes, while self-tapping screws and rubber washers are used to securely fasten the panels to the roof structure.

Closure strips, breather tape, and H-channels are critical for sealing the edges of the panels and connecting panel joints. These components help prevent water ingress and ensure water runoff, reducing the risk of water pooling and leaks. Additionally, protective film on the panels should be kept in place during installation to prevent scratches, and a soft cloth can be used for cleaning any dirt or debris off the surface before finalizing the installation process.

Step-by-Step Installation Process for Polycarbonate Roofing Panels

Step 1: Preparing the Roof Structure

Before starting the polycarbonate roofing installation, ensure that the roof pitch meets the minimum slope requirements. This is crucial for water runoff and to prevent water pooling during heavy rain. Inspect the roof structure for adequate strength and support, especially in older houses or structures with previous roof replacement. The roof structure must be able to handle the lightweight but firm panels effectively.

Step 2: Measuring and Cutting the Panels

Accurate measurements are key to a successful installation. Use a measuring tape to measure the dimensions of the roof and mark the polycarbonate sheets accordingly. When cutting the panels, a circular saw with a fine-tooth blade is recommended to achieve smooth edges and minimize splintering. Always cut with the protective film facing upward to avoid scratching the panels during this step.

Step 3: Installing the Panels

Start installing the panels at the lowest point of the roof, working your way upward. This ensures proper overlap and water runoff. Drill screw holes slightly larger than the screws themselves to account for thermal expansion, as the panels will expand and contract with temperature changes. Use rubber washers with self-tapping screws to secure the panels, being careful not to overtighten screws, as this can lead to roof cracking or damage.

Step 4: Sealing and Finishing

Once the panels are in place, use breather tape and H-channels to seal the panel joints. These materials help prevent water leakage while allowing for necessary ventilation to reduce moisture buildup. Inspect all edges of the panels and joints for gaps or potential areas of water ingress. After sealing is complete, remove the protective film from the panels and perform a final inspection to ensure a proper installation.

screws

Tips for Successful Polycarbonate Roofing Installation

To ensure a better experience and a long-lasting roofing solution, always work on a dry day to avoid water pooling during the installation process. Opt for tinted polycarbonate roof panels if you wish to reduce glare and minimize heat buildup, especially in areas exposed to direct sunlight. This can make the space beneath the roof more comfortable and energy-efficient.

Closure strips are essential for securing the edges of the panels and preventing water ingress. When working on larger roofing projects, such as those for commercial buildings or multi-room spaces, it’s a good idea to consult installation guides or diagrams for additional expert advice. If you’re working on an old house or roof replacement, evaluate the roof structure thoroughly to ensure it can handle the new installation.

For DIY enthusiasts, following the installation techniques outlined in this guide will help you achieve a successful installation. However, for more complex projects or when in doubt, reaching out to construction professionals can save time and ensure proper installation. Always keep safety measures in mind, such as wearing safety glasses and handling tools with care, for a smooth and efficient roofing project.

Before you start installing the polycarbonate roofing panels, you need to prepare the roof. Here’s how:

  • Clean the Roof: Remove any debris, leaves, or dirt from the roof. This ensures a smooth surface for the installation of the panels.
  • Check the Roof Structure: Make sure the roof structure is sturdy and in good condition. If there are any damaged or rotten sections, they should be repaired or replaced before you start the installation.
  • Measure the Roof: Use a tape measure to determine the size of the roof. This will help you calculate how many polycarbonate panels you’ll need.
  • Plan the Panel Layout: Decide on the direction and overlap of the panels. The panels should run from the highest point of the roof (the ridge) to the lowest point (the eave). The side overlaps should be at least 20mm, and the end overlaps should be at least 50mm.
  • Cut the Panels: If necessary, cut the polycarbonate panels to the correct size using a circular saw or jigsaw. Remember to allow for the necessary overlaps.
  • Pre-drill the Panels: Using a drill, create holes in the panels for the screws. The holes should be larger than the diameter of the screws to allow for expansion and contraction of the panels.

Once the roof is prepared, and you have all the necessary tools and materials, you’re ready to start the installation process.

polycarbonate aluminum joiner

Why Polycarbonate Roofing Panels Are the Best Roofing Solution

Polycarbonate roofing panels are highly versatile, making them an excellent choice for various applications such as greenhouses, pergolas, and commercial buildings. Their durability and impact resistance ensure they can withstand extreme weather conditions, including heavy rain, hail, and strong winds. For homeowners and construction professionals alike, these panels are a reliable and cost-effective roofing material that combines functionality with aesthetic appeal.

One of the standout features of polycarbonate roof panels is their UV protection and light transmission, which create energy-efficient spaces. For instance, clear polycarbonate panels allow abundant natural light to enter, making them ideal for greenhouses or sunrooms, while tinted options reduce glare and heat buildup. Additionally, their affordability compared to alternatives like tempered glass or acrylic sheets makes them accessible for projects of all sizes, from small sheds to large commercial roofing projects.

Another reason these panels are favored is their excellent weather resistance and adaptability to different roof structures. Corrugated polycarbonate roofing is particularly durable and resists cracking, making it a good idea for areas prone to temperature changes.

curved pergola polycarbonate roofing sheet

Maximizing the Benefits of Polycarbonate Roof Panels

Regular maintenance is key to extending the lifespan of your polycarbonate roof. Periodically inspect for signs of roof cracking or water ingress, especially around panel joints and edges of the panels. Cleaning the roof with a soft cloth and avoiding harsh chemicals will help maintain its clarity and UV protection over time. For areas experiencing extreme weather conditions, consider installing breather tape to reduce condensation and prevent damage caused by temperature fluctuations.

To enhance energy efficiency, opt for dark tinted polycarbonate sheets, which provide better insulation and reduce heat transfer. Proper roof insulation and the use of closure strips can also help in maintaining temperature control and preventing water leakage. These steps ensure that your roof performs optimally, even in challenging climates.

For long-term durability, choose solar control Low-E polycarbonate sheet with excellent UV protection and weather resistance. Corrugated polycarbonate sheets are particularly ideal for outdoor structures like pergolas or patio covers, as they are designed to handle both direct sunlight and heavy rainfall. By following proper installation and maintenance practices, you can enjoy the full benefits of your polycarbonate roofing for years to come.

Wall-Mounted-Pool-Enclosure-768x576

FAQ

1. What are the advantages of using clear roofing made of polycarbonate?

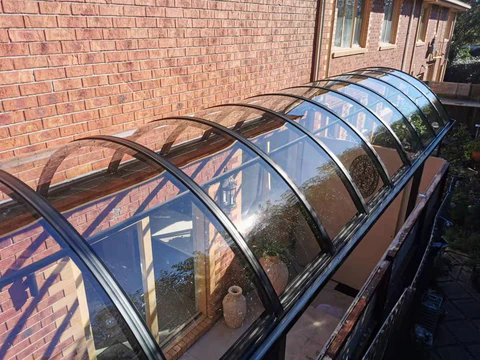
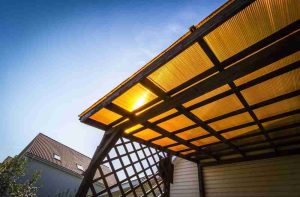
Clear roofing made of polycarbonate offers several advantages. It allows natural light to filter through, creating a bright and inviting space underneath. It’s also highly durable and resistant to impact, making it a long-lasting roofing solution.

2. Can I use corrugated sheets for my pergola roof?

Yes, corrugated sheets made from polycarbonate are an excellent choice for a pergola roof. They offer a unique blend of durability, light transmission, and aesthetic appeal, making them ideal for this application.

3. Do I need to use silicone when installing polycarbonate roofing?

Yes, using a silicone sealant can help ensure a watertight installation. However, it’s important to use a silicone product that’s compatible with polycarbonate to avoid any potential damage to the panels.

4. Is pre-drilling necessary when installing polycarbonate roofing?

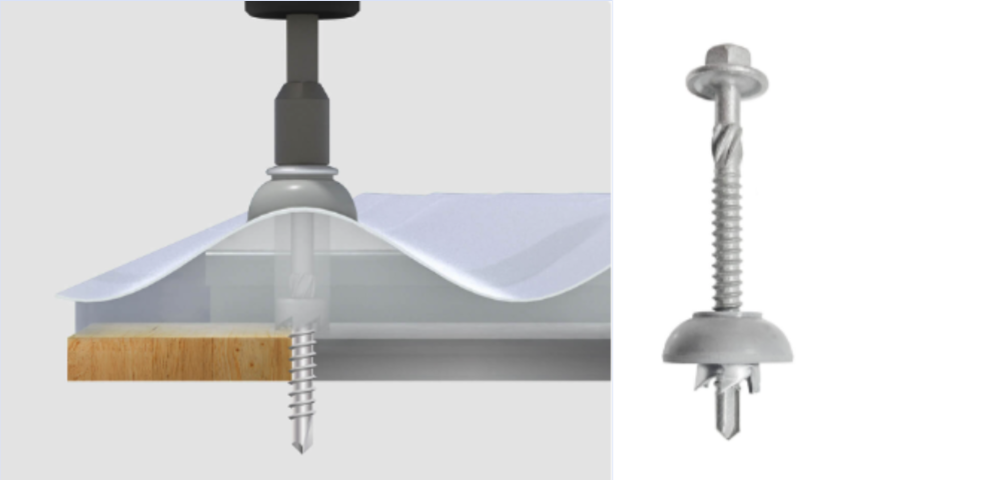
Yes, pre-drilling is recommended when installing polycarbonate roofing. This helps to prevent the material from cracking or splitting during the installation process.

5. Can I use polycarbonate roofing as an alternative to metal roofing?

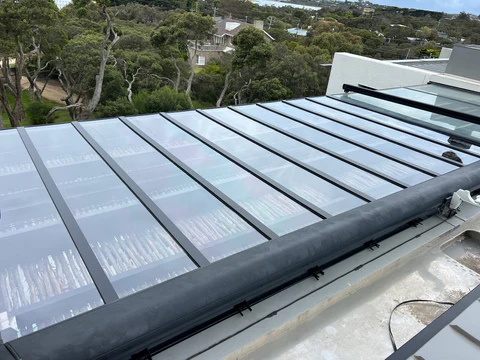
Yes, polycarbonate roofing can be a great alternative to metal roofing. While metal roofing is known for its durability, polycarbonate offers additional benefits such as light transmission and impact resistance.

6. What is the ideal roof pitch for installing corrugated roofing made of polycarbonate?

The ideal roof pitch for installing corrugated roofing made of polycarbonate is typically a minimum of 5 degrees. This helps to ensure proper water runoff and prevents any potential issues with water pooling on the roof.

7. Can I use plastic roofing for my pergola?

Yes, plastic roofing, particularly polycarbonate, is a popular choice for pergolas. It’s durable, allows light through, and can withstand various weather conditions, making it a practical and attractive option.

8. What is the warranty on polycarbonate roofing panels?

The warranty on polycarbonate roofing panels can vary depending on the manufacturer. However, many high-quality polycarbonate roofing products come with a warranty of at least 10 years.

9. What are purlins and why are they important in polycarbonate roofing installation?

Purlins are horizontal beams that are used to support the roofing panels. They are crucial in polycarbonate roofing installation as they provide the structure that the panels are attached to.

10. Can I use PVC instead of polycarbonate for my roofing project?

While PVC can be used for roofing, it doesn’t offer the same benefits as polycarbonate. Polycarbonate is more durable, has better light transmission properties, and is more resistant to impact and UV radiation compared to PVC.


TAILORED POLYCARBONATE SOLUTION

Get a Quote Today

Looking to transform your vision into a tangible product? 

At Excelite Plastics, every project is unique.

sales@exceliteplas.com

+86 135 8555 4902 (China)

+61452 396 680 (Australia)

Block 1 RuiSu Building, 2 Kecheng Rd, Suzhou, China 215122

Australia Branch: 6 Stephen Road, Dandenong South 3175

Click or drag a file to this area to upload.